After getting the proper knowledge of the basic SQL terms from our previous blog, let's process further. In this article, we will cover the MySQL Workbench installation process in the system. This article will help you to install MySQL Workbench with its server setup in your system. This step-by-step process will be very easy to perform, ensuring your system is ready for further Security Testing Services if needed to evaluate any vulnerabilities during the installation.
Table of Contents
My SQL Workbench Installation Process
Step-1 Move to any of the browsers and search for “MySQL”.
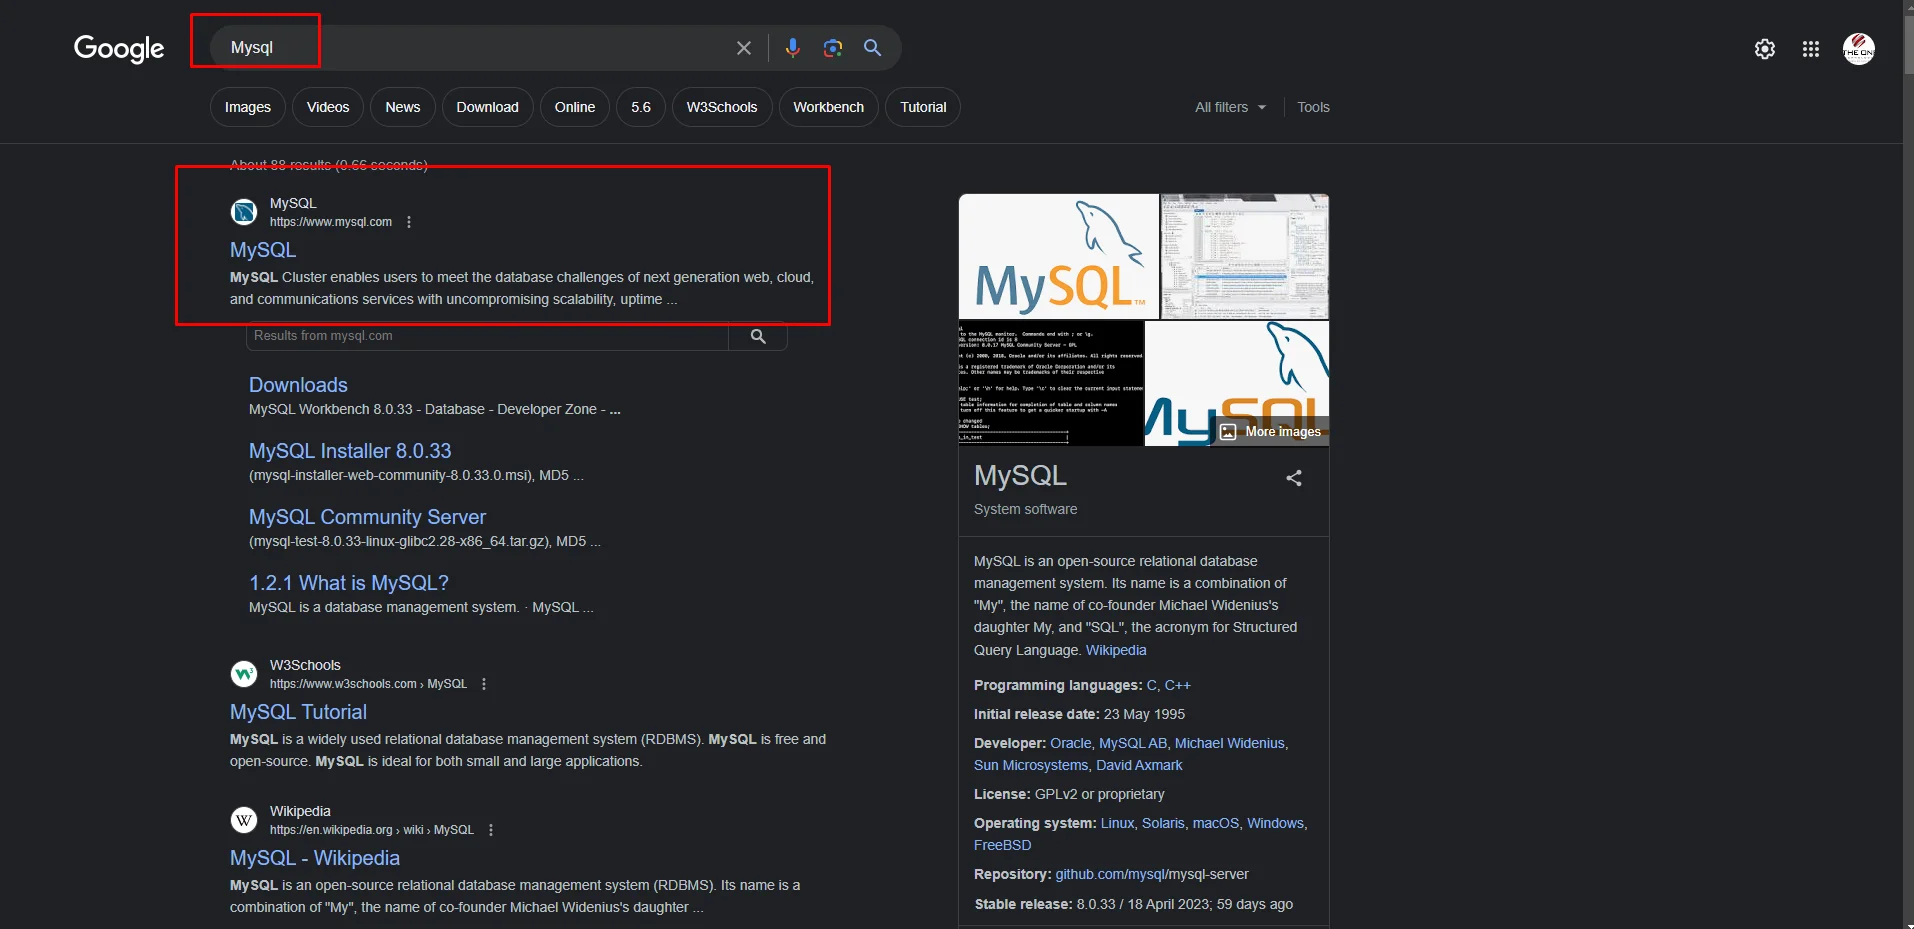
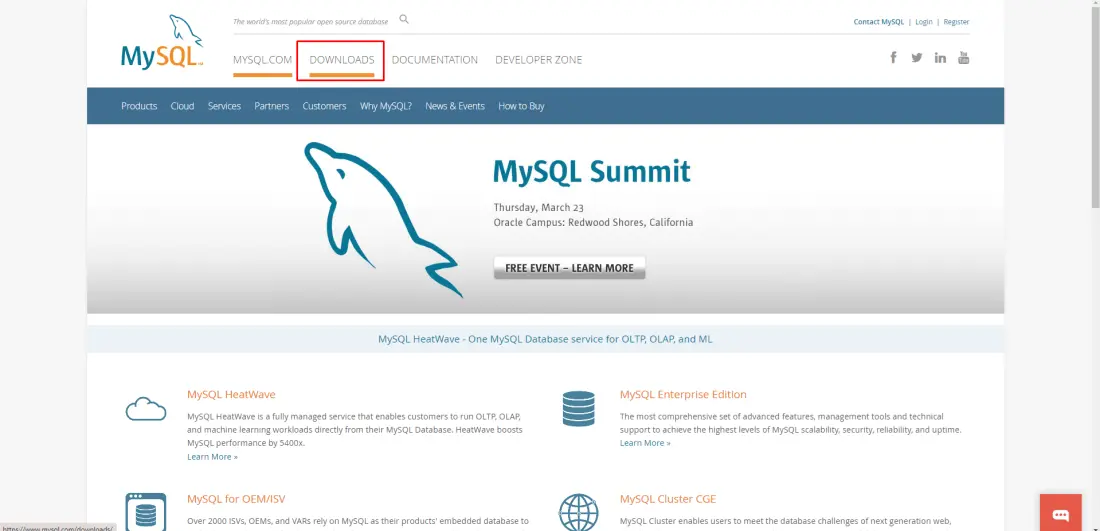
Step-2 Click on link with domain name “mysql.com” and move to its “Download Page”.
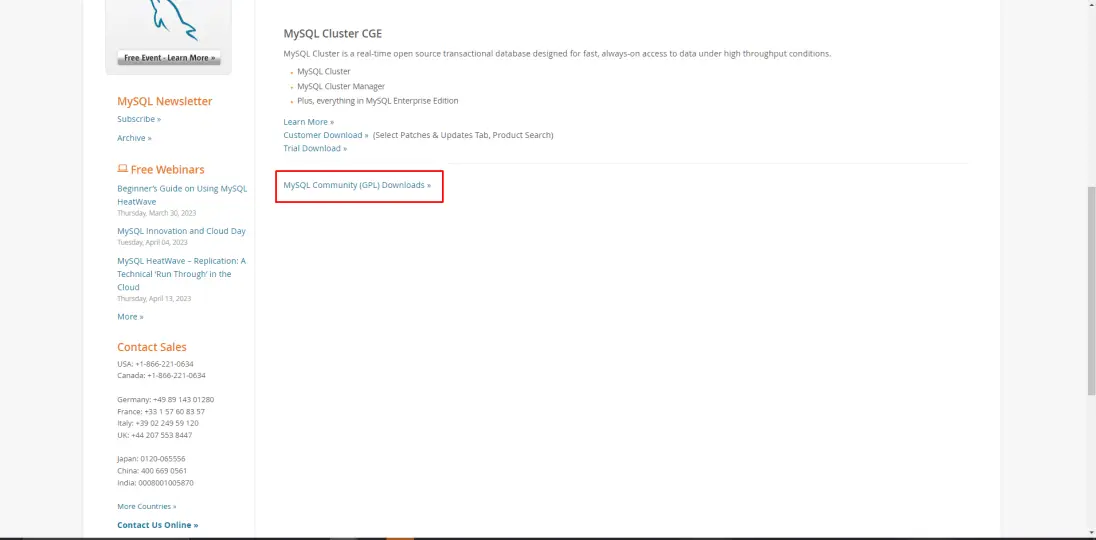
Step-3 Scroll Down to the bottom and click on “MySQL Community (GPL) Downloads »” link.
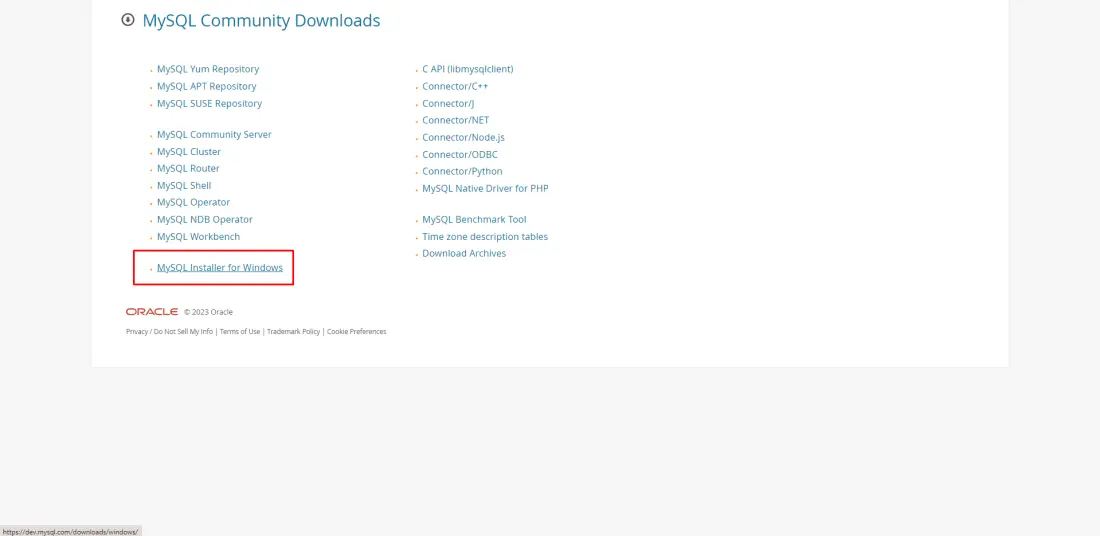
Step-4 Click on the "My SQL Installer for Windows" link.
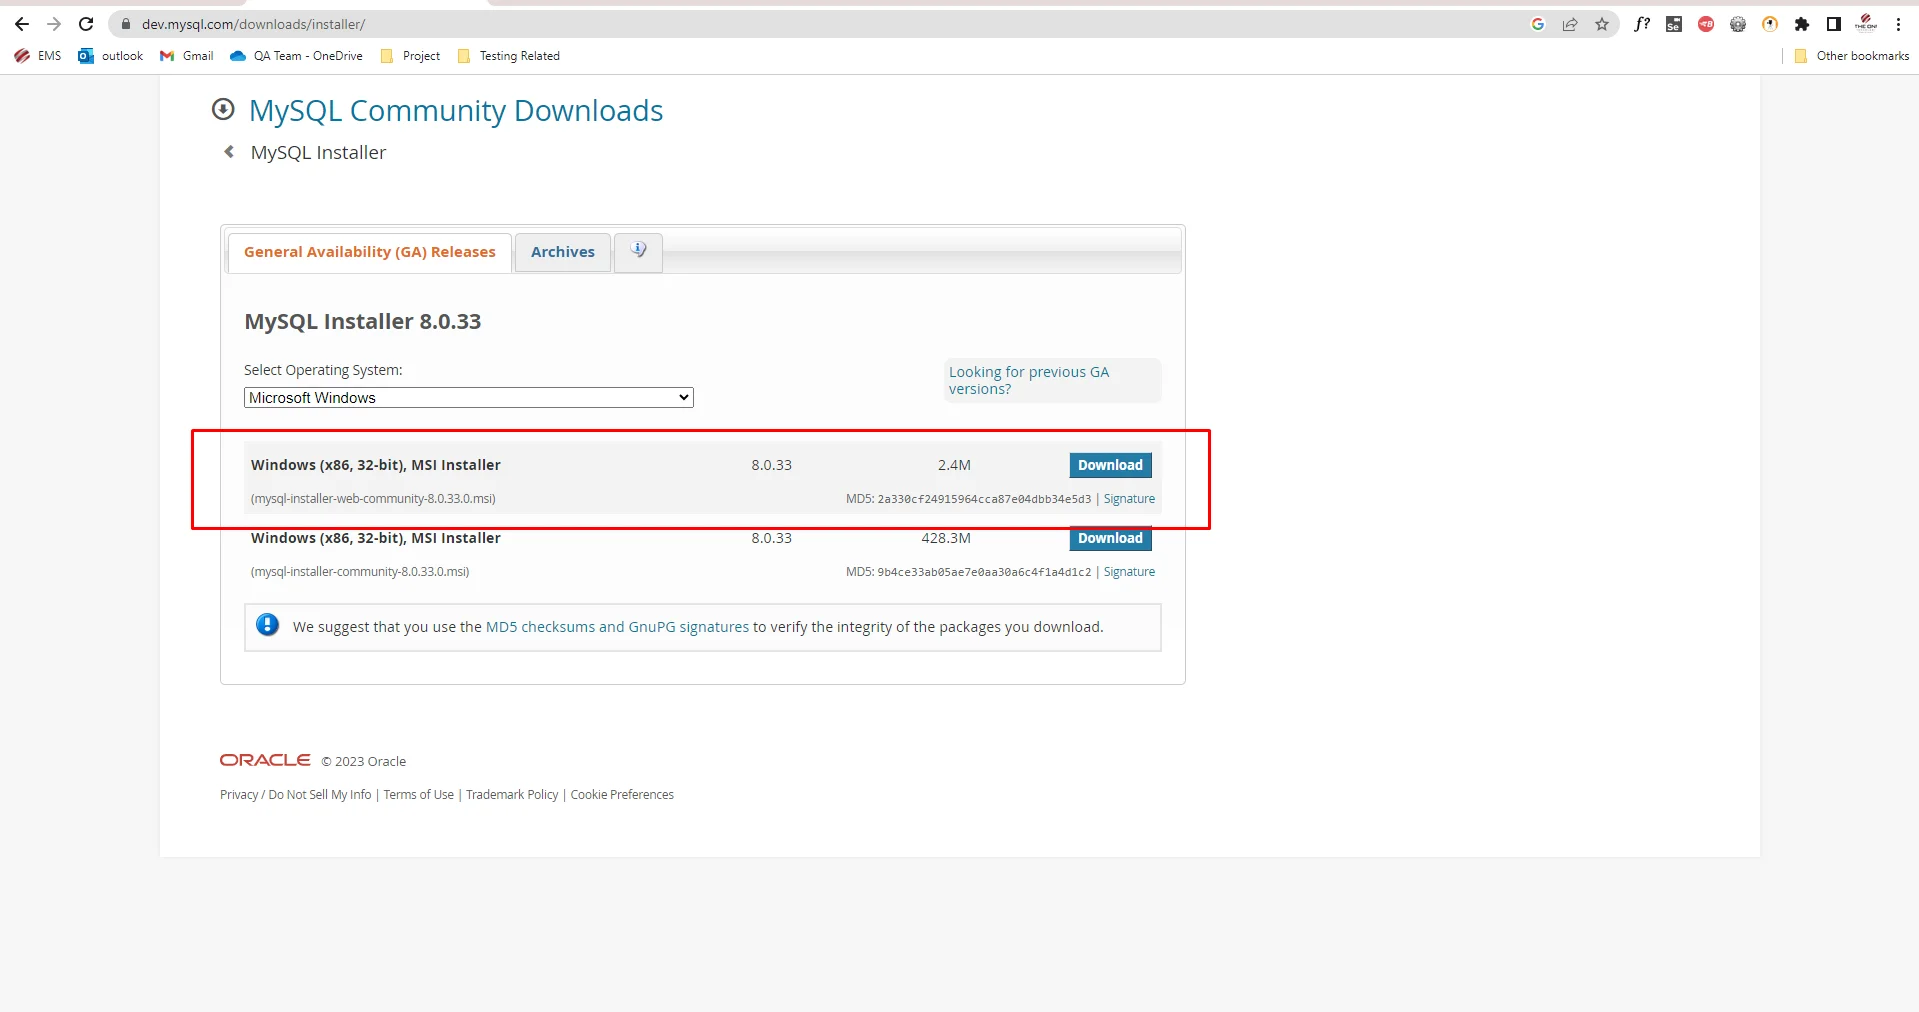
Step-5 Choose the First Installer and click on the "Download" button.
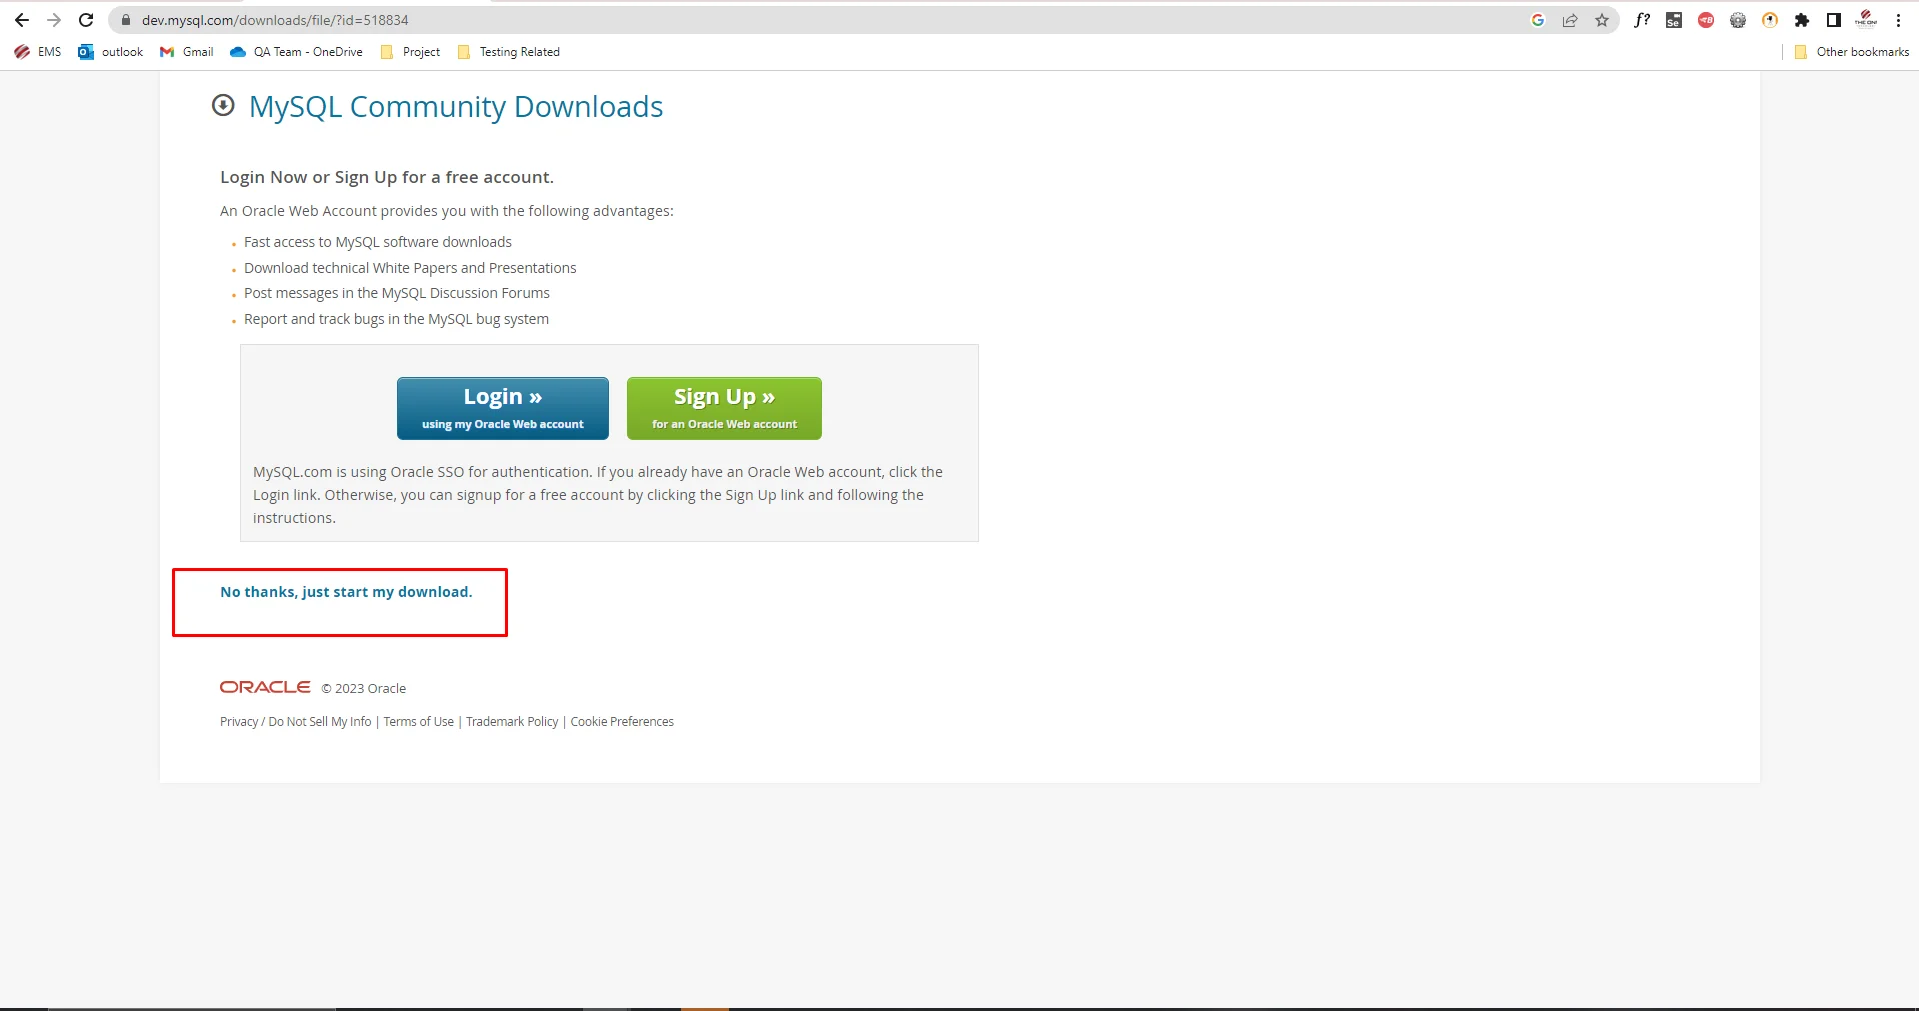
Step-6 Click on the "No thanks, just start my download" link.
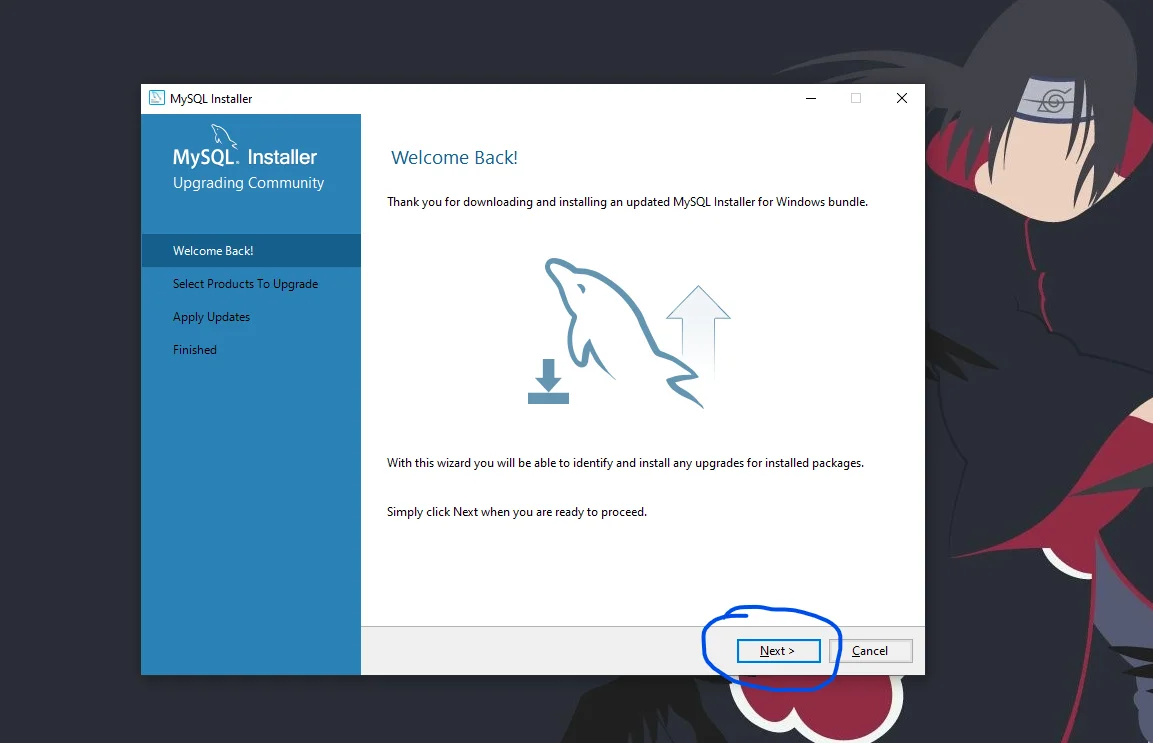
Step-7 Once the file is downloaded, open the folder and start the installation. Choose the “Next” button in the opened dialog pop-up.
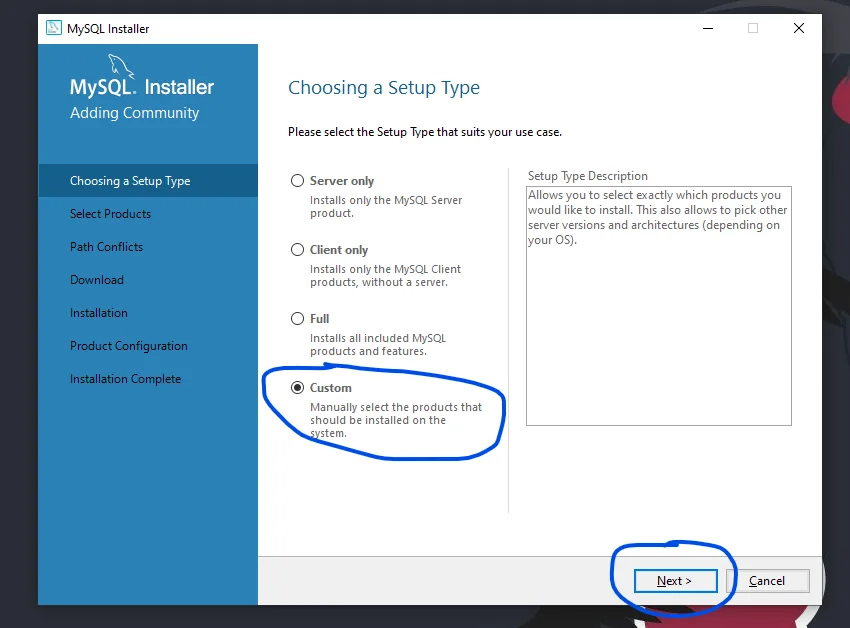
Step-8 Select the “Custom” option and click on the Next button.
Step-9 Now expand the columns for “MySQL Servers” and choose the top version server under “MySQL Server” (i.e., MySQL Server 8.0 ) and click on the Right Arrow seen for moving the selected server to the right.
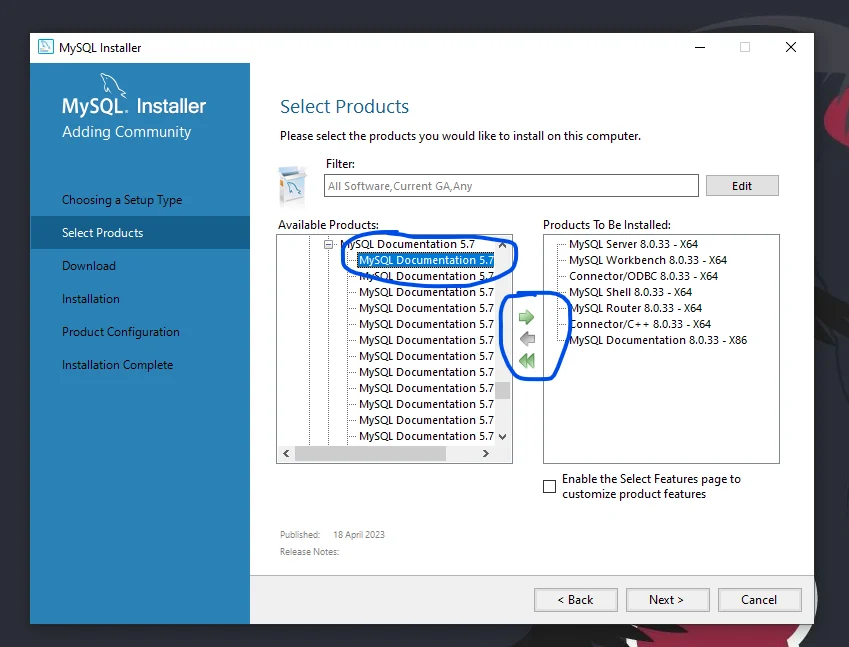
Step-10 Now select the latest servers for the “Applications "and “MySQL Shell” as well and click on the “Next” button.

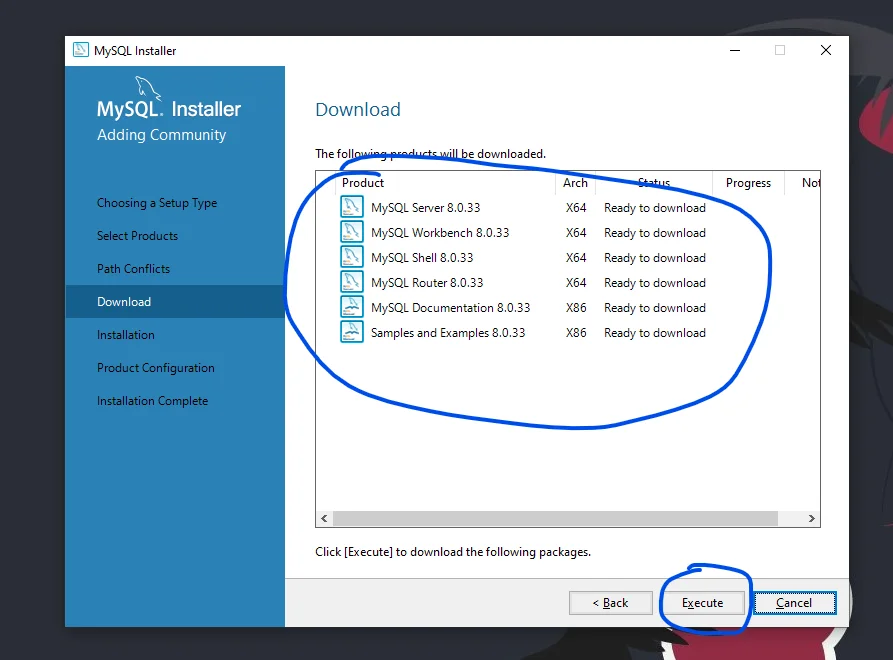
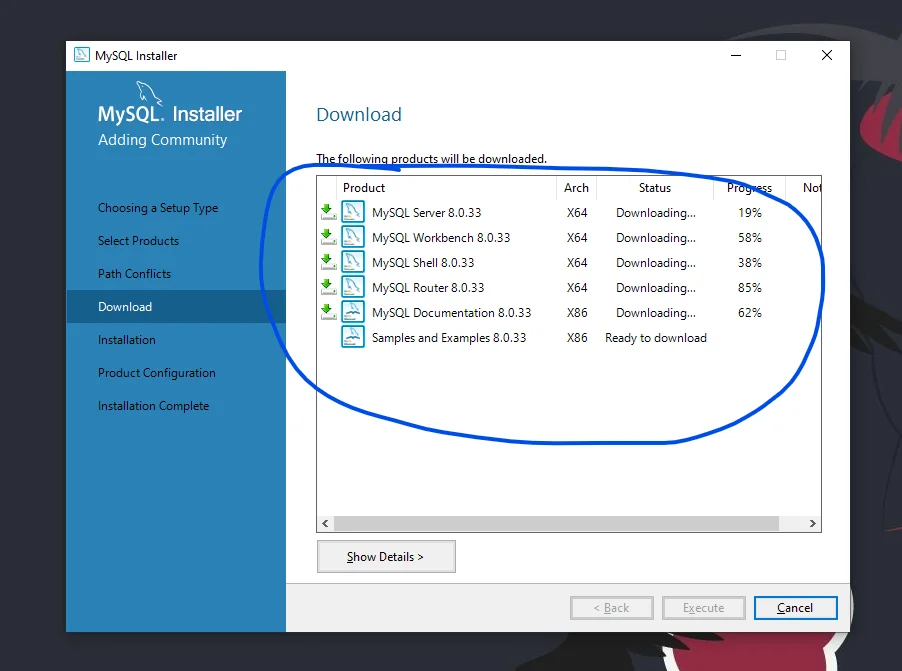
Step-11 Click on the “Execute” button and wait for the installation to get started.
Step-12 Wait till the installations get completed and keep clicking on the “Next” button.
Step-13 Now the installation process will ask you to set the “Root Password” for the user and you can even add a new user if you want to. Note: Please remember the password or note it somewhere securely.
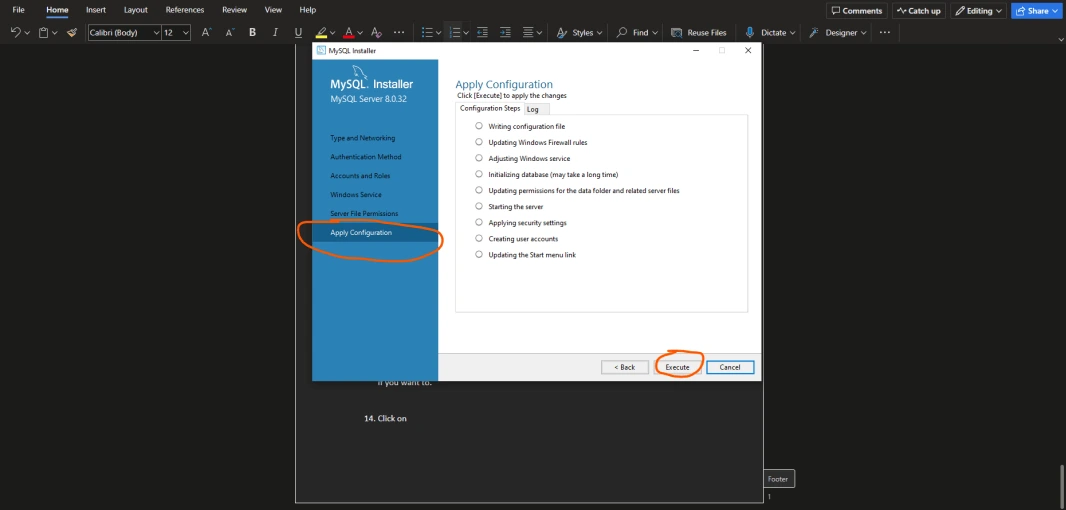
Step-14 Click on the “Execute” button on the Apply Configuration window.
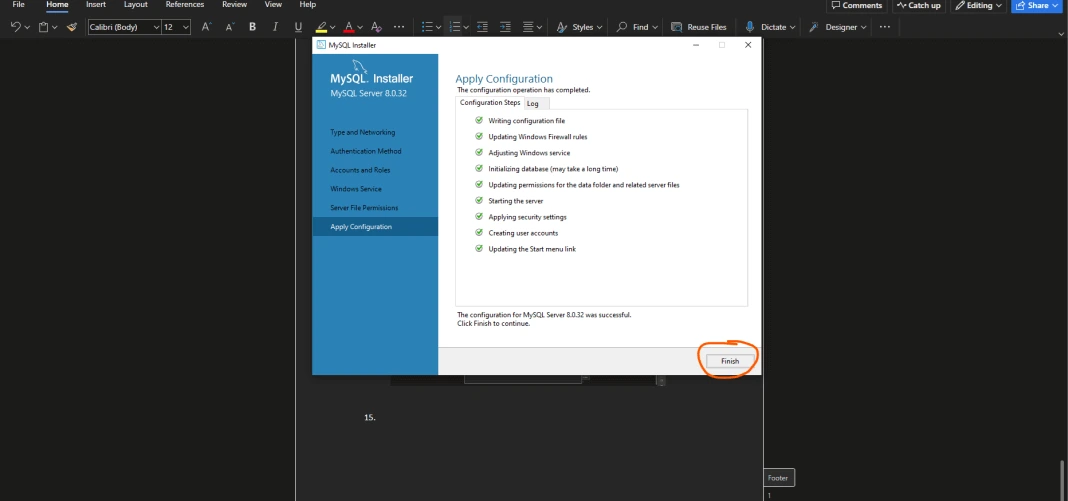
Step-15 Click on the “Finish” button.
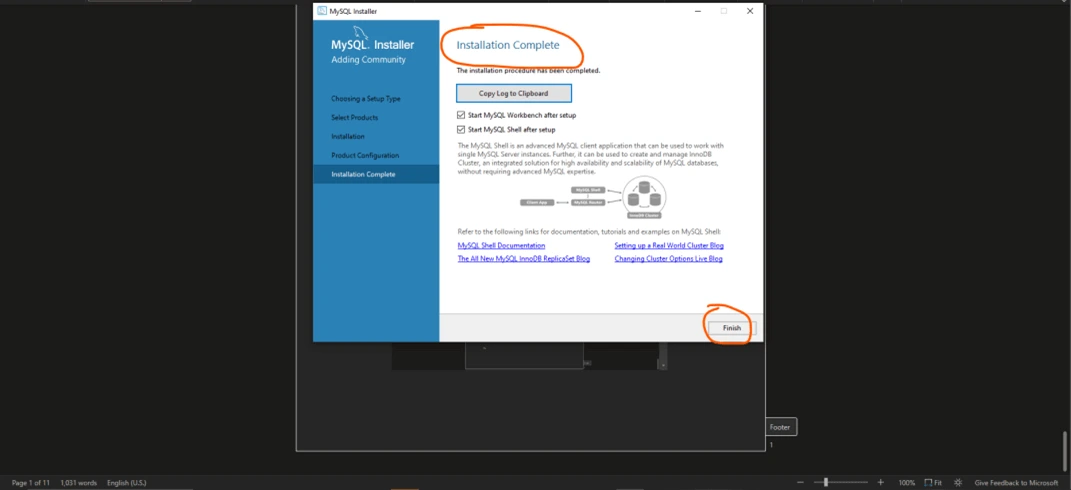
Step-16 Click the “Finish” to the Installation Completed dialog box.
Step-17 The Workbench will automatically get launched and then you can start working on it.
Connecting to MySQL server:
Before starting the work in My SQL Workbench, we need to set up the SQL Server. So, follow the steps one by one, mentioned below:
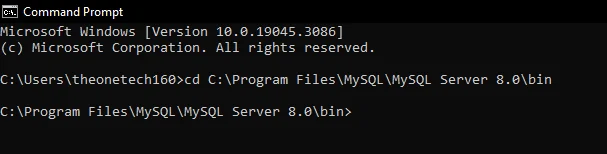
Step-1 Open your Command Prompt from the Window.
_638228561227498075.webp)
Step-2 Now enter the command “cd (The full path of your SQL bin folder location) “and hit ENTER button. (e.g. - cd C:\Program Files\MySQL\MySQL Server 8.0\bin).
Step-3 Now type "mysql -u root -p" and hit ENTER. It will ask you for the password. Enter the root user password and hit the Enter button. After this process, the command prompt is converted with "MySQL" text.

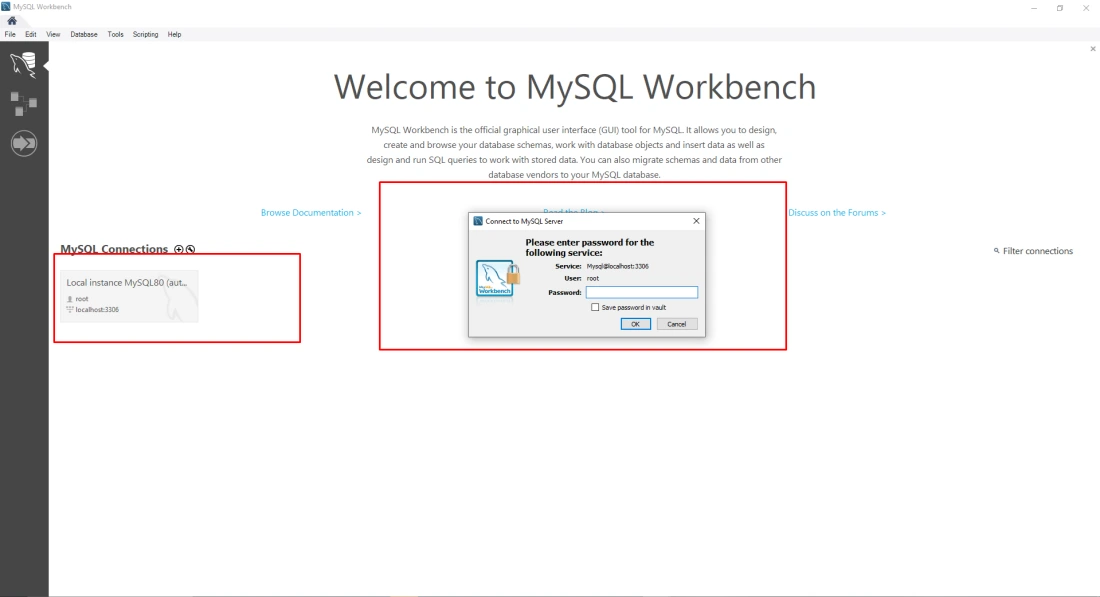
Step- 4 Now start MySQL Workbench 8.0 and choose the local host user and enter the password of the Root User.
Step-5 Now click on the "Startup/Shutdown" category seen under the "Instance" module within the "Navigator" panel and check the server status as Running.
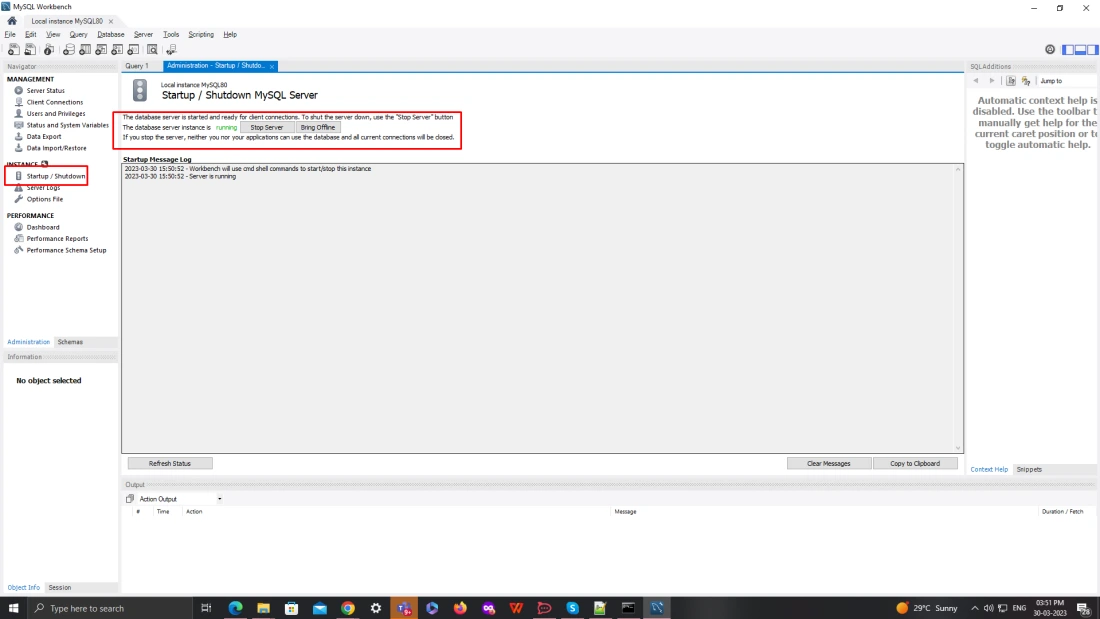
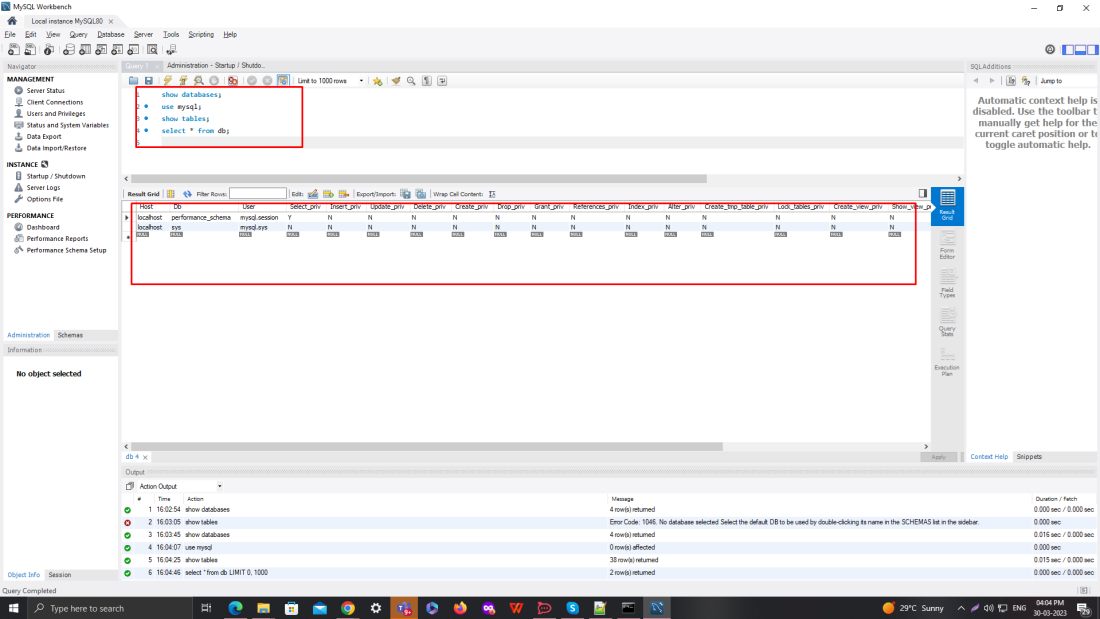
Step-6 The setup is done, and our SQL server is running. Now, you can start running queries in the provided work area.
Read More
Learn powerful MySQL queries used in software testing to verify database integrity, automate validation tasks, and enhance QA workflows with efficient data checks.
Conclusion
Installing SQL in the system is relatively easy, but it requires some expertise to configure it properly. Following our expert's step-by-step SQL installation guide, you can perform the task accurately.
So, after successfully installing MySQL Workbench in your system, you are ready to move forward, that is, executing the daily used SQL Queries. We will have a bunch of queries that will be useful in our daily development or testing work.
Author Bio
 Bhargav Padalia started his career in the QA field two years back. He got his first certification in manual testing; he has claimed the title of the rising star. Currently, he is working as a QA executive in a software testing company.
In his leisure time, he loves watching detective movies and learning new things that make him more proficient in his career.