Before we start with pen testing, let us understand what OWSP ZAP tool is, what are features it offers and which mode you can use within the tool.
Table of Contents
- What is ZAP?
- Install ZAP
- Persisting a Session
- ZAP Desktop UI
- Running An Automated UI
- ZAP Scanning Report
- Convert Report Into PDF
- Conclusion
What is ZAP?
Zed Attack Proxy (ZAP) is a free, open-source penetration testing tool being maintained under the umbrella of the Open Web Application Security Project (OWASP). ZAP is designed specifically for testing web applications and is both flexible and extensible, making it a valuable tool for Security Testing Services.
ZAP Features:
Zap tool has various features. Experienced quality assurance experts can use it in multiple ways, while the beginner can utilize it in a simple way. Here are a few basic features:
- Easy to install on your PC.
- Cross Platform (Mac, Linux, Docker etc.)
- Easy to use also runs in Headless mode.
- Fully documented.
- There are Free Add-ons.
- Free tool more powerful execution.
ZAP Mode:
Zap tool has total 4 modes available. Each mode has a different effect and different use. It is important to know what these modes are and how they are useful.
- Safe - no potentially dangerous operations permitted.
- Protected - you can only perform (potentially) dangerous actions on URLs in the Scope.
- Standard - as in previous releases, you can do anything in your system.
- ATTACK - new nodes that are in Scope Actively scanned as soon as they are discovered on your PC
_638229340784740930.webp)
Install ZAP
First of all we need to do is install ZAP on the system for you intend to perform pen testing. Download the appropriate installer from the zap website
Note: ZAP required Java 8+ in order to run. The Mac OS/X installer includes an appropriate version of Java, but you must install Java 8+ separately for Windows, Linux, and Cross-Platform versions. The Docker versions do not require you to install Java.
Once the installation is complete in your system or PC then launch ZAP and read the license terms.
Click Agree if you accept the terms, and ZAP will finish installing, then ZAP will automatically start.
Persisting a Session
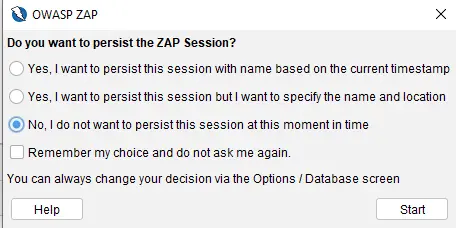
When you open ZAP tool you will get “Persist the ZAP Session” Popup everytime.
Step - 1:When you first start ZAP, you will be asked if you want to persist in the ZAP session? By default, ZAP sessions are always recorded to disk in a HSQLDB database with a default name and location. If you do not persist in the session, those files are deleted when you exit ZAP.
Step - 2: If you choose to persist a session, the session information will be saved in the local database so you can access it later, and you will be able to provide custom names and locations for saving the files.
Step - 3: For now, select No, I do not want to persist this session at this moment in time, then click Start.
ZAP Desktop UI
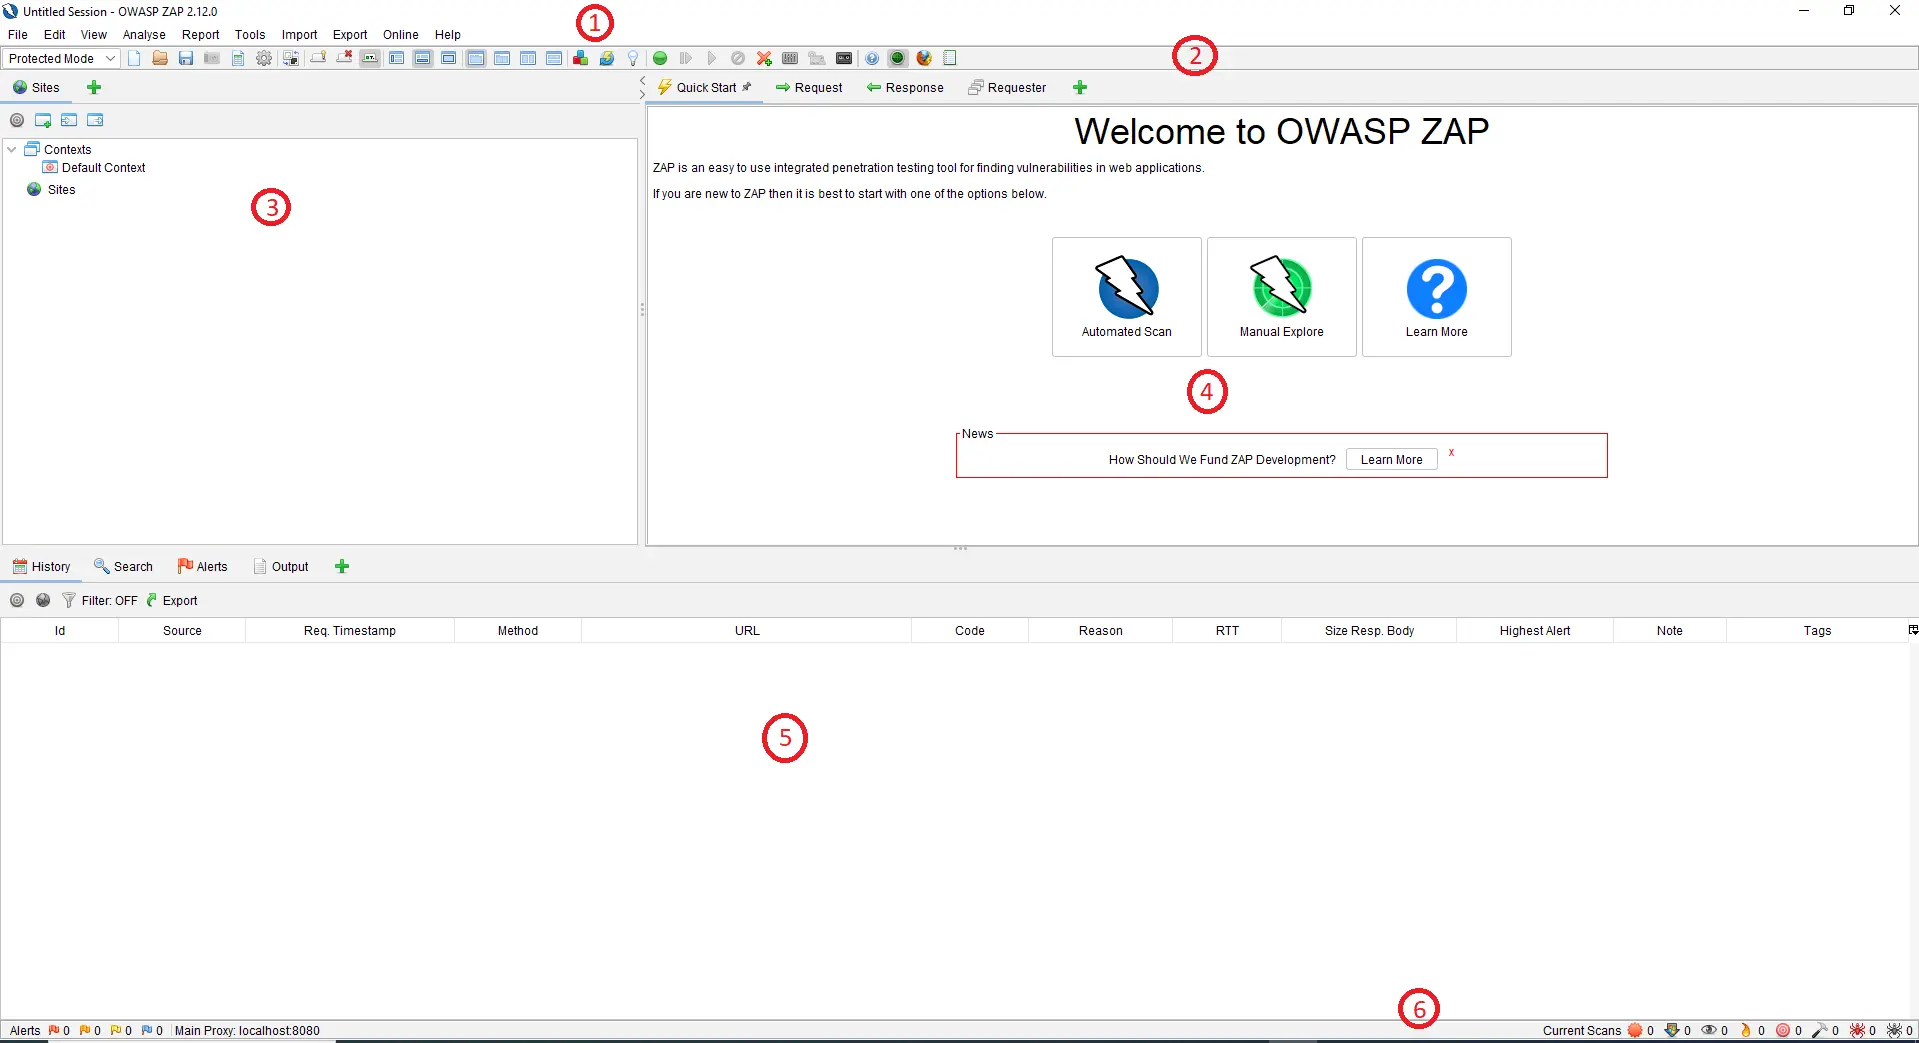
The ZAP Desktop UI is composed of the following elements:
1.Menu Bar – Provides access to many automated and manual tools.
2.Toolbar – Includes buttons which provide easy access to most commonly used features in ZAP.
3.Tree Window – Displays the Sites tree and the Scripts tree from left side view.
4.Workspace Window – Displays requests, responses, and scripts and allows you to edit them for two option.
5.Information Window – Displays details of the automated and manual tools from information.
6.Footer – Displays a summary of the alerts found and the status of the main automated tools for current scans.
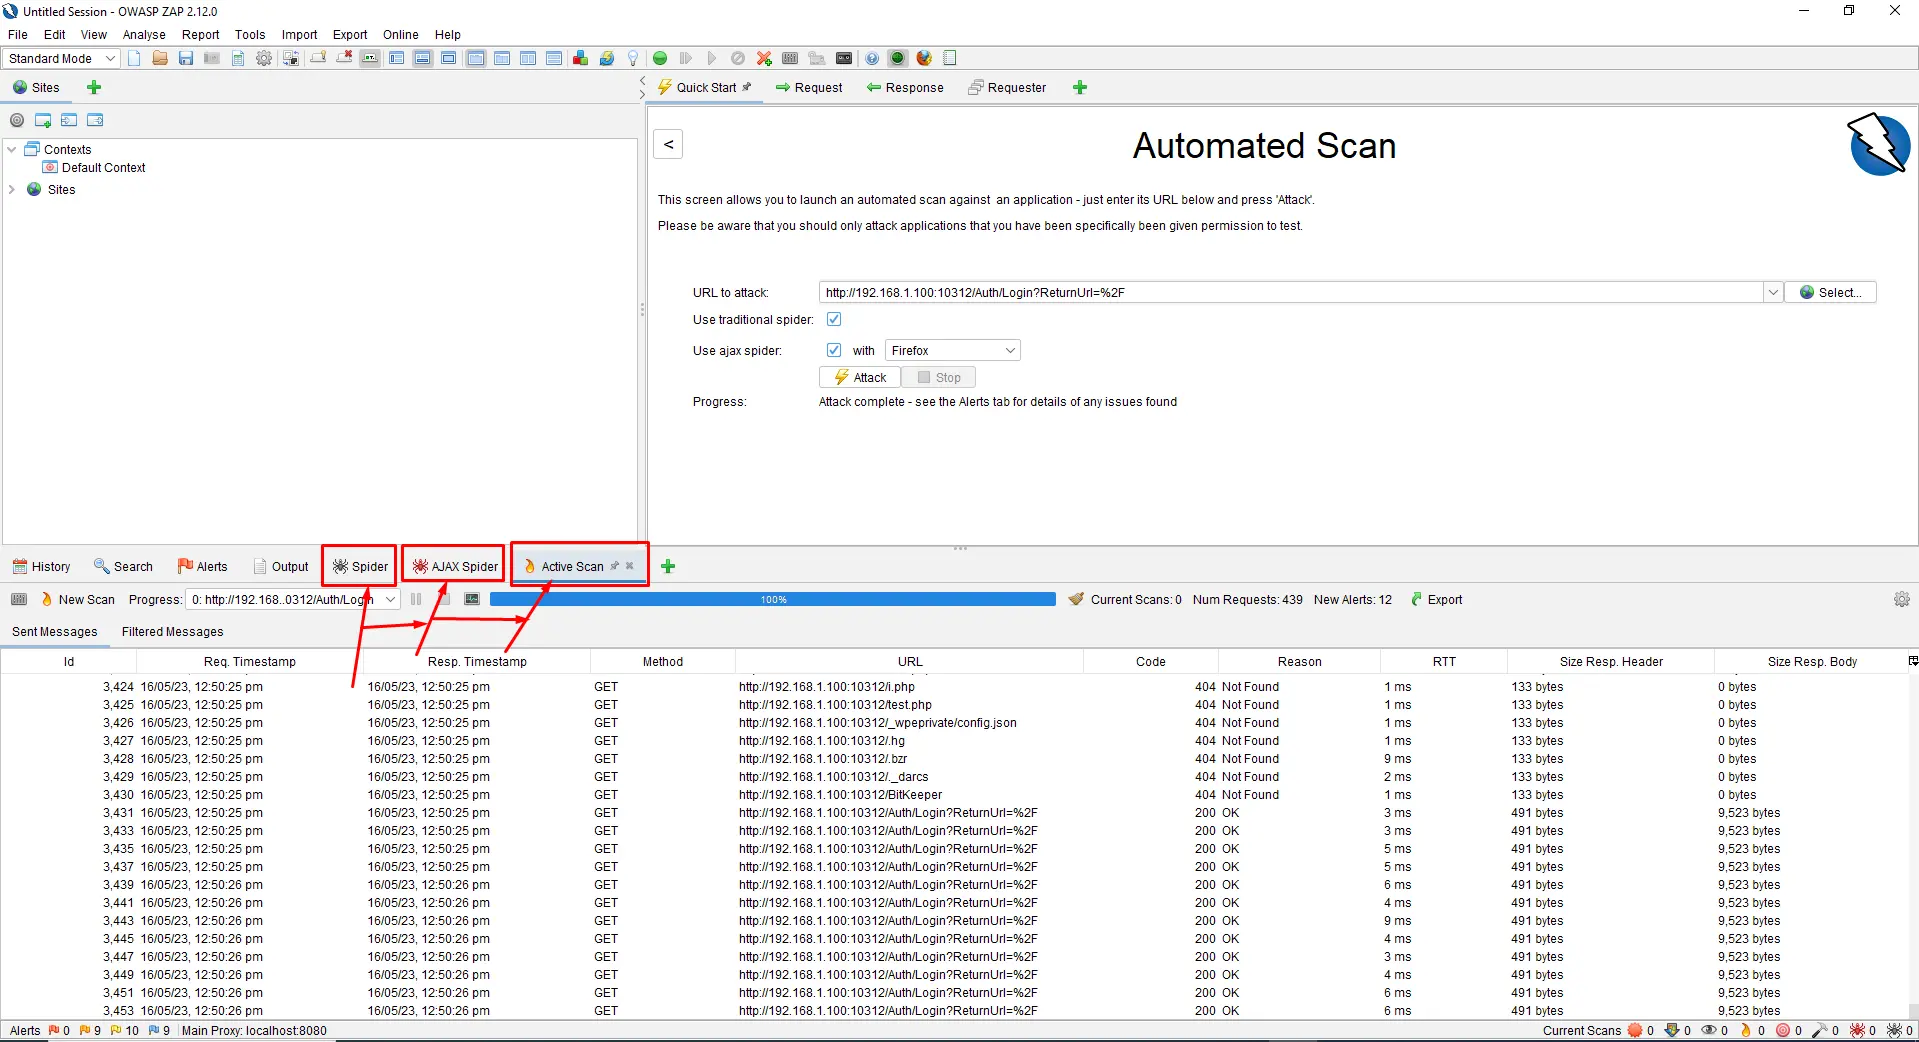
Running an Automated Scan
To run a Quick Start Automated Scan:
Step - 1: Start the ZAP and click on the Quick Start tab of the Workspace Window.
Step - 2:Click the large Automated Scan button.
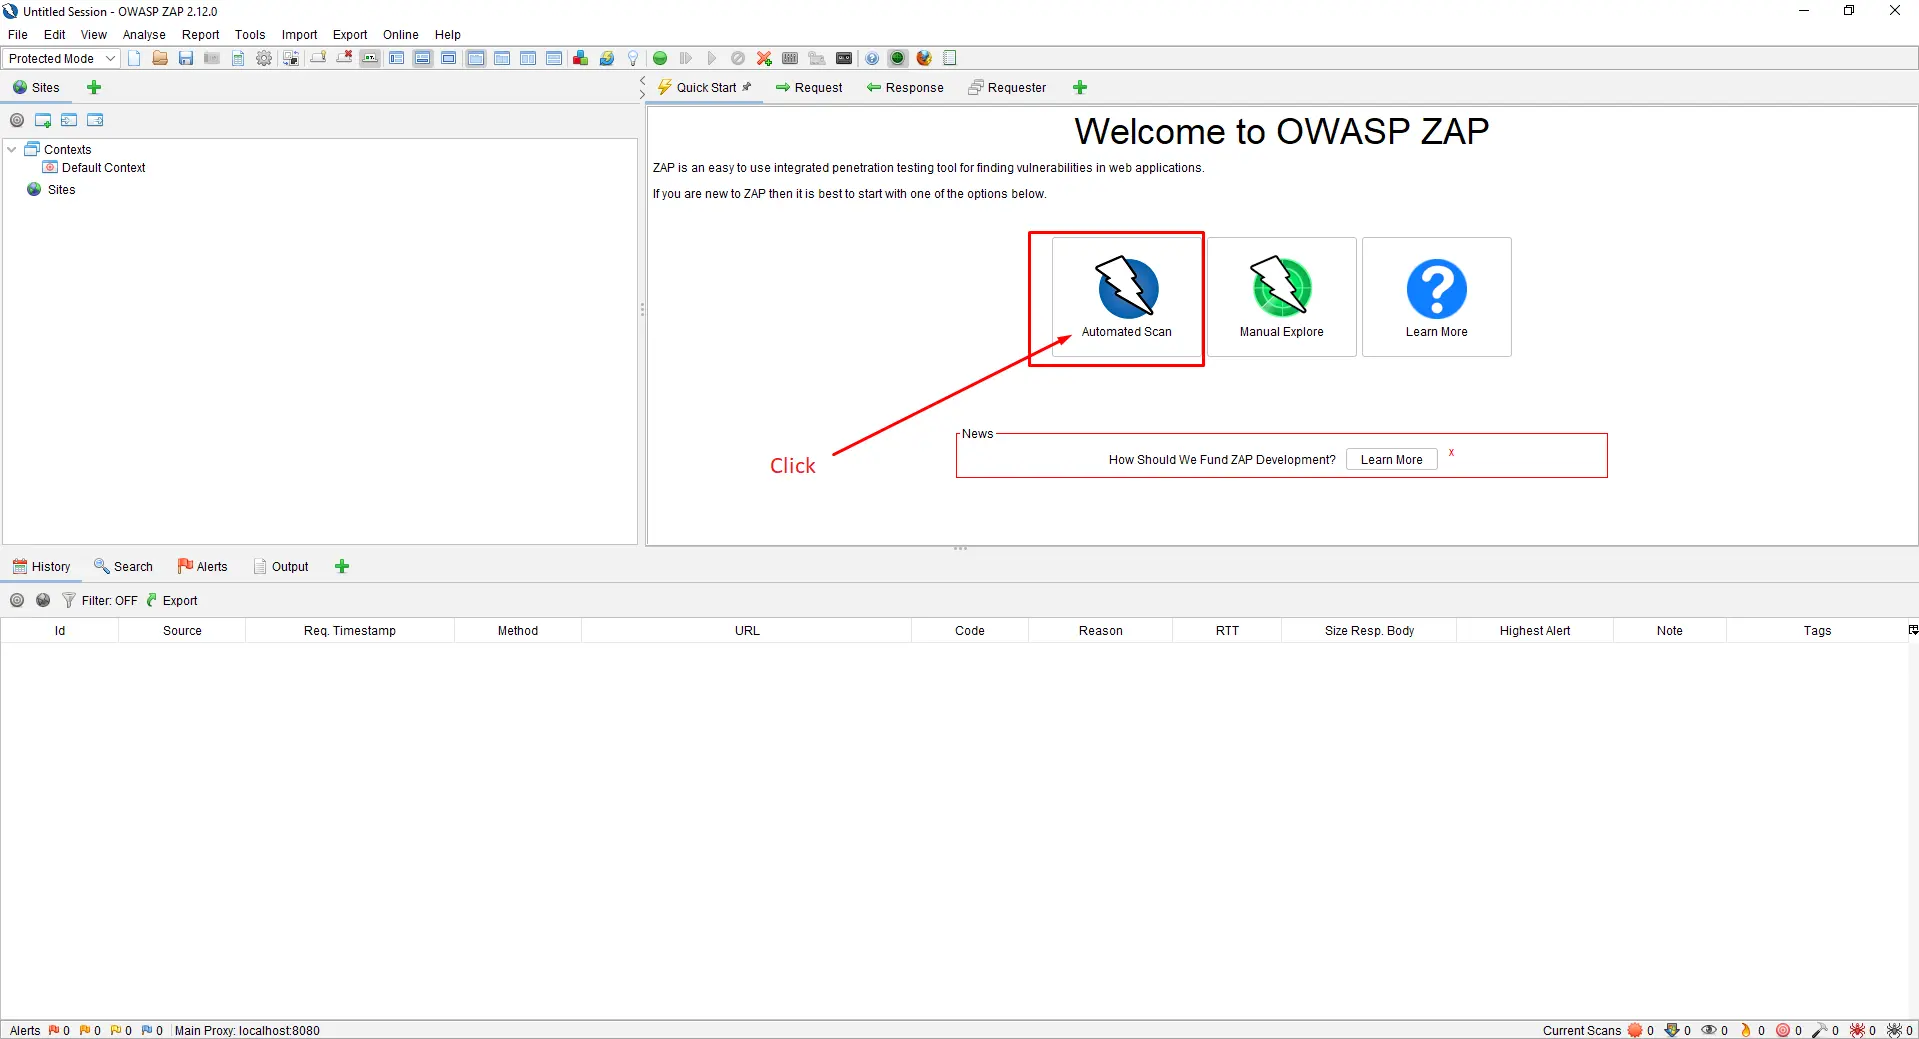
Step - 3: In the URL to attack text box, enter the full URL of the web application you want to attack.
Step - 4: Click the Attack.

Step - 5: Spider>AJAXSpider>ActiveScan
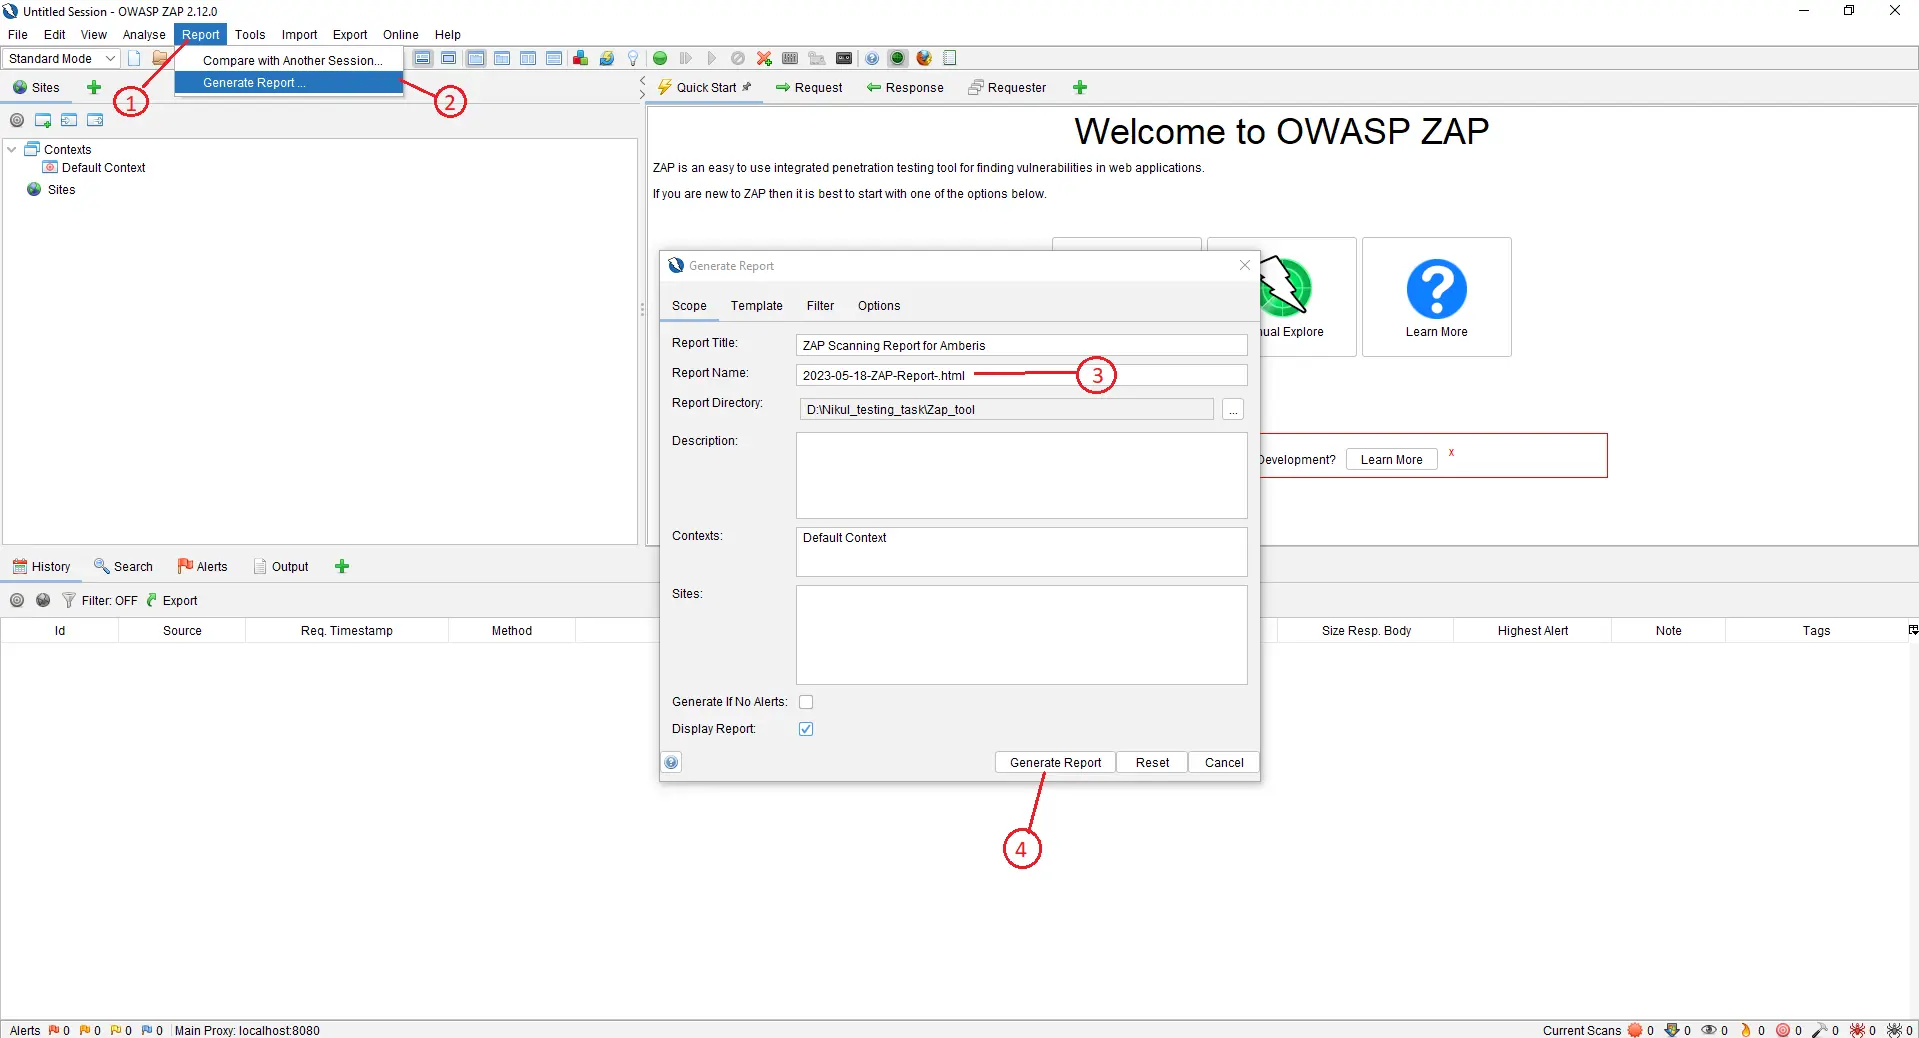
ZAP Scanning Report
Step - 1: Choose option for Report on Menu bar.
Step - 2:Select Report & Generate Reports.
Step - 3:Select Report Directory when you want to save report
Step -4: Click on Generate Report button
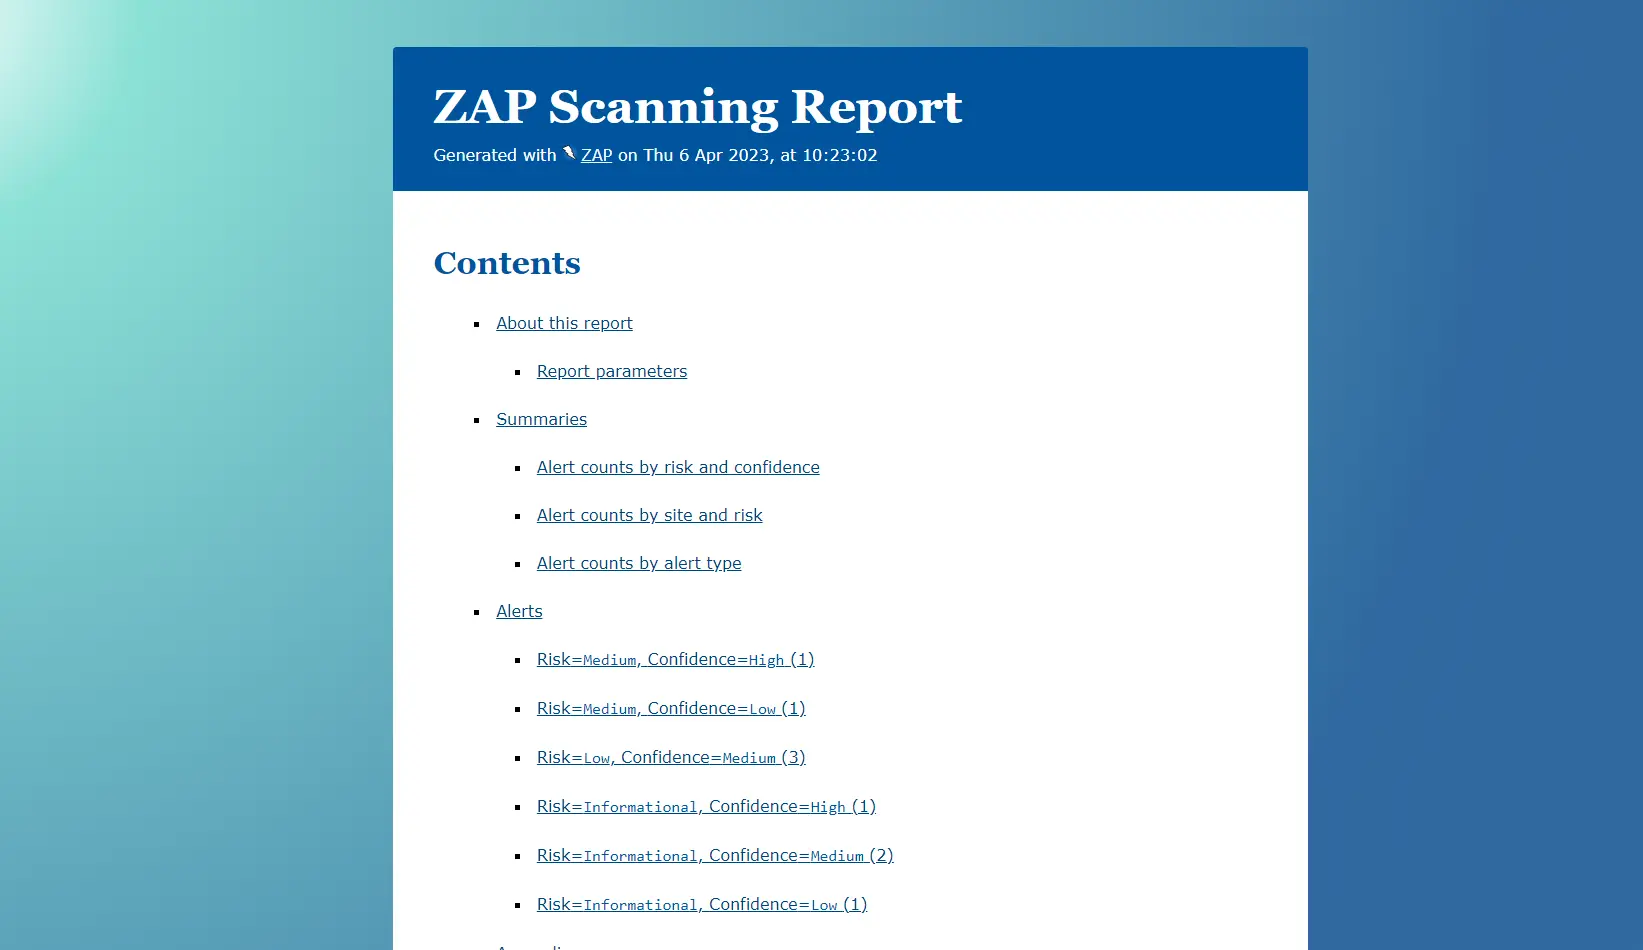
Output: Below screenshort is in HTML format Report
Convert Report into PDF
Step - 1: Shortcut key Press CTR+P Below screen open.

Step - 2: Choose Destination into Microsoft Print to PDF Option.
Step - 3: Select Background graphics and Click on Print button.

Conclusion
There are various tools for Pen Testing available in the market. But Using OWASP ZAP for Pen Testing is the easiest we found. It also provides multiple features that are very helpful for penetration testing.
Experts from PixelQA, a well-known software testing company, are trained and experienced in using various testing tools that can help with accuracy and efficiency. We provide automation and manual testing services so clients can receive user-friendly and bug-free applications.
About Author
 Nikul Ghevariya started his journey in 2019 as a trainee at PixelQA, and is currently working as a QA executive. He has explored multiple domains like e-commerce, health, and education. His future goal is to keep enhancing his knowledge in QA, automation, and API testing.
In his leisure time, he loves to watch movies, web series. He also plays kho-kho and loves to go on a long drives.